Heart of Fire Metal Works By Isaiah Regan

Forging Your First Knife
My first experience with blacksmithing was knifemaking. Today, I'd like to share a quick tutorial on how you can get off the couch and make that first knife
Isaiah Regan
5/8/2024
I love knifemaking. Maybe it's the smooth feel of the handle in my hand after polishing. Perhaps it's the feeling of accomplishment that comes from having built something useful. Most likely, it's all of those things. I've spent a good amount of time making knives and today I'd like to share a few tips on how you can make your first knife the best it can be.
First off, you'll need a few tools. Most importantly, you need a forge. You can make a simple forge from bricks and use hardwood charcoal for fuel. Once you've got your forge set up, all you need to do is light it up and supply a lot of oxygen to the flame. This can be accomplished with a cheap hairdryer, I personally used a leaf blower when I first started. Next, you'll need a hammer, a small sledgehammer, between two and three pounds is probably the cheapest starting option, although if you really want to start blade smithing, you ought to invest in a good cross-pein hammer. Now that you have your hammer, you'll need to buy a set of tongs to hold your material. You can find a cheap set of tongs on the internet for around forty or fifty dollars, but eventually, you should learn to make your own tongs. Finally, you'll need a hard, smooth surface to forge on. In the worst-case scenario, you can use a smooth rock, but I recommend buying a cheap anvil. You can usually find them for around $30 on the internet. Besides all this, you'll need some safety glasses and a set of heavy welding gloves, nothing too tight or you might boil your hands inside your own gloves. Also, if you're working with charcoal, there will be an enormous amount of sparks, so I would buy some sort of apron so that your shirts don't end up looking like Swiss cheese. One thing you should avoid is wearing any sort of polyester or synthetic cloth, otherwise, you could very well end up with a bunch of burning whatever stuck to your skin.
Now that we've got everything set up, let's get to forging. First, let's forge the point. Set the metal at an angle to the anvil and strike the other side with the hammer at the same angle. As you work down the width by striking the vertical, regularly turn back the horizontal to maintain the same thickness as the piece. Once you have the tip forged to a point, strike one side of the tip to knock it back into alignment with the spine of the blade. Next, we need to forge in the tang. The tang is the part of the blade that will become our handle. Holding the blade straight on the anvil, strike the material to lower the width to a place where the tang fits comfortably in your hand. As always, while you are working the vertical, keep going back to the horizontal to even everything out. Once you have the tang to the width and length that you want it, you can start working on the blade. Now, whenever you strike hot metal with a hammer, the metal squishes away from the blow. Because of this, when you hit the section that will become the edge, the blade will always curve away, giving you a curved knife. Unless you want that, you should give the blade a recurve before working on, or beveling, the blade. Once the knife has the necessary recurve in it, you can begin striking the blade to thin it out. Be careful to hit the blade equally on both sides so the blade remains straight. When you finish, the blade should have the general shape of a knife. Next, you'll need to straighten the blade, as it probably has a few curves in it from forging, this is where an actual anvil comes in handy. Set the blade flat on the anvil on the horizontal and lightly tap it along the spine. Then, hold the blade up and look straight down the spine. remember, hammer strikes always push metal away, so if there is a warp on the left side of the blade, you want to strike it on the right side. For this part, you'll just need to go back and forth until you have a straight blade.
Congratulations, you know have a blade. Now, before you quench, you'll need to do a little refinement before the quench. If you have some sort of grinder that you know how to use, that will work great, but you really only need a file. First, you'll want to file off as much of the forge scale as possible, but really, looks aren't super important for your first knife. Next, you want to clean up the tang and the spine to get rid of any rough hammer marks. Next, use a round file to round the transition between the blade and the tang, if the transition is square, it serves as a stress point where the blade may break. Finally, use the file to take the blade down to an edge with an angle of about 20 degrees.
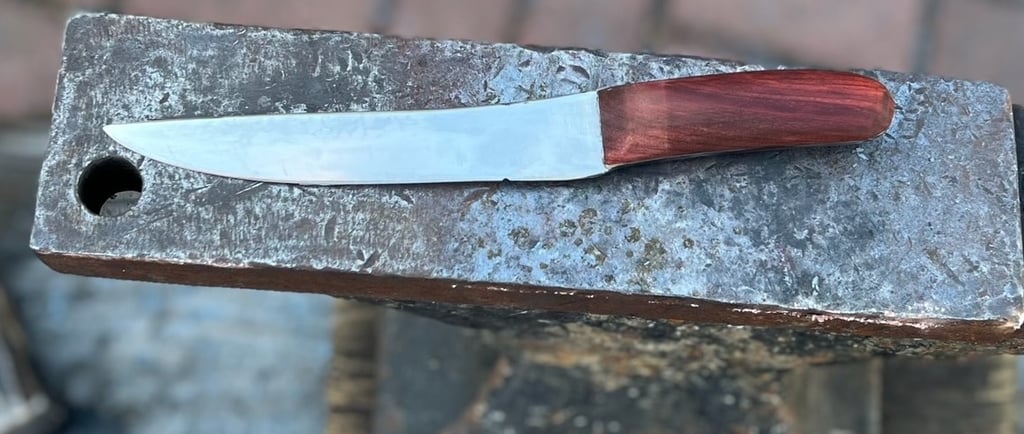
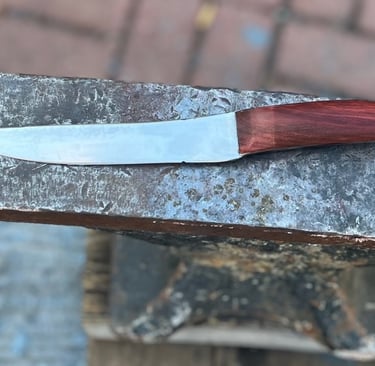
Now for the final and most crucial step of the process, the heat treatment. To make a very complicated subject short, quenching, one part of the heat treat, is when you take the blade from a very high heat to a much lower heat in a very short amount of time. This changes the internal structure of the metal so that it will retain an edge instead of blunting when you use it. Before you quench the blade, you want to normalize the blade. Normalizing is when you heat the blade to an incandescent shade, a light orange should work, and then let it cool back down to black. Once you've normalized the blade to or three times, you can quench it. The cheapest and safest quench medium for you is probably either vegetable oil or water. If you are using an old file as recommended you can probably quench in water, if you are using a professional knifemaking steel like 1095 or 1080, I would recommend using oil, although it can be a little more dangerous. Basically, you need to heat your edge to a cherry red to dark orange and then dunk the blade in your quench medium until the blade is black again. You'll want to stir the blade around for the best quench as that allows it to have as much contact with the medium as possible. Once you've quenched you can use a file to test if the blade has hardened. If the file digs into the blade, you'll need to quench it again, if the file skates off, then congratulations, you've hardened your blade. One small thing to note if you are going to quench in oil, there are often flame-ups with the blade hot blade meeting the oil. You should wear gloves when quenching and you need to be prepared for the flames. Now that you've quenched the blade, you need to temper it so that it won't crack easily. You can temper in your home oven or even in a toaster oven. You will need to heat the blade to around 350 degrees for about an hour. Once the blade has finished tempering you can polish it with sandpaper and add your handle.
The handle is the interface between the user and the blade, so it's very important that you create a handle that can be used comfortably. I would recommend using a simple wood for your handle as more exotic hardwoods need more experience and better tools to work with. A 2x4 works well and is simple to shape. Set your blade on the wood and trace out the shape twice in separate places. Cut out your handle scales as closely as possible and then shape them with your file and sandpaper to the proper shape, thickness and polish. Finally, glue the handle scales to the tang with super glue. Congratulations, you've made your first knife, may it be the first of many.